Yam XJ600 Diesel bike conversion
Moderators: Dan J, Diesel Dave, Crazymanneil, Stuart
-
- Site Admin
- Posts: 1290
- Joined: Fri Jul 15, 2011 4:22 pm
- Location: London
Re: Yam XJ600 Diesel bike conversion
another update!
I have been doing some more work recently. The gearbox is now mounted, I have aligned the rear sprocket with the gearbox sprocket, finished off the bracketry and sorted out the tachometer in the dash Its taken me a long time to get to this stage, its very slow going. The gearbox has also been rebuilt internally, new o rings all round, new sealed bearings! Its probably still going to leak but I will try my best to keep the oil in it!
Also, there does not appear to be a SPA section belt in the length I need (525mm), which is slightly annoying. So I have ordered NuT link belting which should mean I can adjust the tesnsion realtively easy as my gearbox is fixed in place with the engine (I was going to go with a tensioner, but if I can avoid it, then good!
I have also started the paperwork crap that needs to happen with the DVLA.
Some pictures
-
- Site Admin
- Posts: 1290
- Joined: Fri Jul 15, 2011 4:22 pm
- Location: London
Re: Yam XJ600 Diesel bike conversion
Another update:
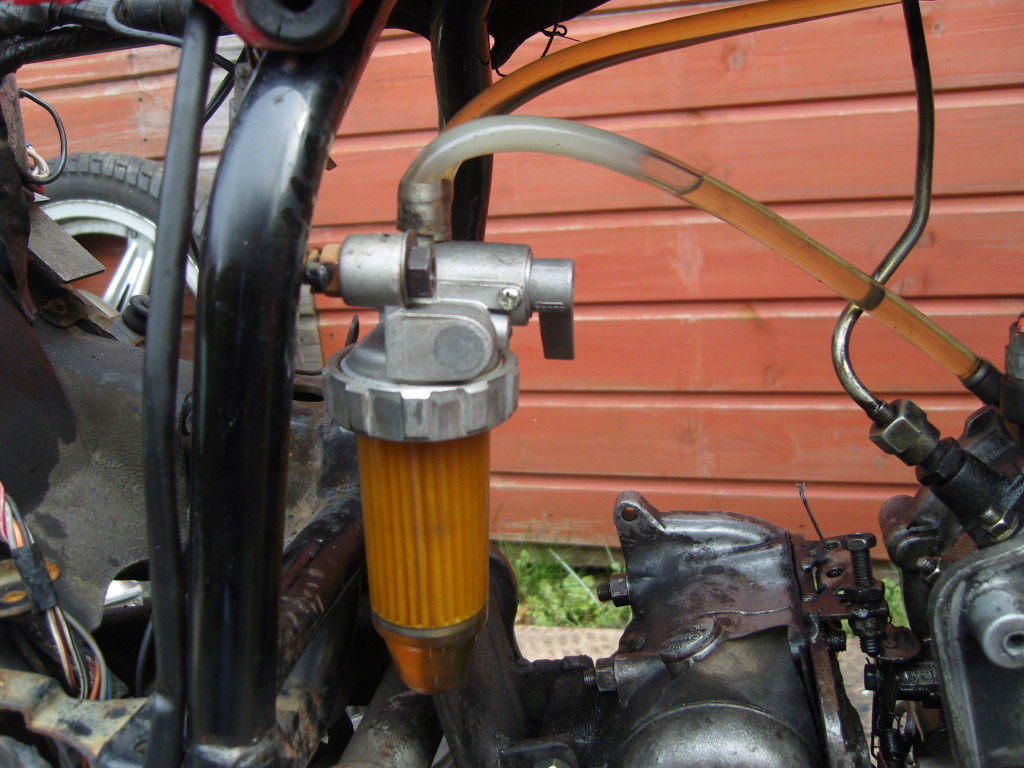
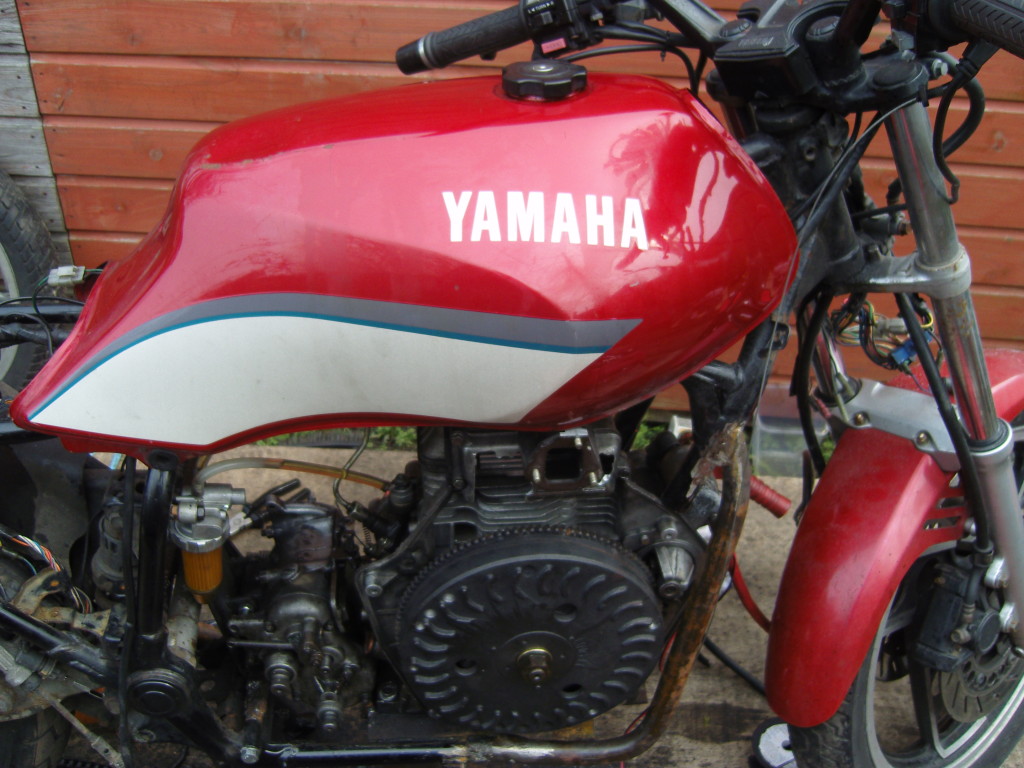
Some more work on the bike today. Got the flywheel balanced using a modified wheel balancer, happy that that is blalanced now. Sorted out of the fuel system, just waiting on a t piece for the injector return. Test ran the engine, (yup it still works ). Modified the intake cover for the electric fan cooler. Thats about it so far The original throttle cable is too short which is annoying, so I need to get another throttle cable. Hopefully tomorrow will be a bit more productive.
Some pics:
-
- I luv the smell of Diesel...
- Posts: 280
- Joined: Tue Sep 20, 2011 8:58 pm
- Location: California
Re: Yam XJ600 Diesel bike conversion
You've requested no comments about your welds. My apologies but I must comment and risk offending you. I'd like for you to be around here for a long time, rather than just until your first serious ride. I've been welding since 1965.
A motorcycle frame is no place to learn welding. They're more difficult to weld properly in the first place even if experienced. To jump in with no experience and re-weld a bike frame that's been effectively cut in half is asking for disaster. The learning part needs to take place on scrap metal, hopefully with someone very experienced available who can critique your work. Use some scrap tubing similar to the bike frame, add some plate similar to what you're welding to practice, then destructive test by cutting in half crossways to and through the weld bead. Bend the metal away crossways to the bead too, looking for fractures or breakage. This will show how deep and good the penetration really is, regardless of how it looks.
The pictures on page 1 of the frame welds at top of frame [2nd pic], near valve cover [3rd pic], and right below flywheel [last welding pic] shows a frame that's ready to break in half, suddenly and without warning. Much the same on page 2. With the spatter, smoke and look of beads, with cut-back [errosion of parent metal] plus poor penetration it looks like the wrong voltage and incorrect polarity. Dirty metal with paint and oil contamination too? If that's a MIG machine like you mentioned then something's very wrong.
The parent metal you're welding must be spotless, super clean, with no - zero - not any rust, paint, oil, grease, chemical residue, dirt or any other contamination. Otherwise you will get welds like those in the pictures and again, poor penetration, the most serious matter. I don't insist on welds being pretty but structurally they must be sound, with proper penetration and coverage. It doesn't do any good to grind them down so they look better. Proper beads should look excellent with no grinding at all! Sorry to offend you but hey, I don't want you or somebody else to get hurt or killed! I hope you'll look into that very deeply, possibly get some outside advice. Sorry if you're offended but I'd rather have you angry than dead...
.
-
- Site Admin
- Posts: 1290
- Joined: Fri Jul 15, 2011 4:22 pm
- Location: London
Re: Yam XJ600 Diesel bike conversion
Do not worry, im not offended or annoyed. I would like people to point out when there is something I can do better or especially anything that can affect my safety.
I have redone many of the welds, and whilst its the first time using a mig, its not my first time welding.
I am also using flux cored wire becuase I ran out of gas, I did switch the polarirty using that, but it still splatters, I did do a fair bit of practise with the mig before I started welding, which I why I ran out of gas I think
Most of the welds that I have cut through to check penetration have been ok. with good penetration into the parent metal. They may look very bad, but I have redone 90% of them since taking those pics.
-
- I luv the smell of Diesel...
- Posts: 280
- Joined: Tue Sep 20, 2011 8:58 pm
- Location: California
Re: Yam XJ600 Diesel bike conversion
Thanks, Alexander, I was really troubled about posting those negative comments. Glad it was well received.alexanderfoti wrote:Do not worry, im not offended or annoyed. I would like people to point out when there is something I can do better or especially anything that can affect my safety.
I have redone many of the welds, and whilst its the first time using a mig, its not my first time welding.
I am also using flux cored wire becuase I ran out of gas, I did switch the polarirty using that, but it still splatters, I did do a fair bit of practise with the mig before I started welding, which I why I ran out of gas I think
Most of the welds that I have cut through to check penetration have been ok. with good penetration into the parent metal. They may look very bad, but I have redone 90% of them since taking those pics.
Not sure how you did the frame extension parts but I've described a way to make a strong joint in the past. Sounds complicated but it's not. For mine I first make the cut. At this point it may be necessary to bend or heat and bend the frame tubes to give yourself some clearance for the rest but most often the entire frame is separated anyway.
I then drill through outer frame tube in several places, like 6-8 holes about 1/4"-6mm diameter around circumference on each side of cut. Say 2-3 holes at every 90* around circumference. Dress off the ragged part inside of tube where drill bit punched through so it's smooth.
Then insert a heavy wall tube inside frame matching frame's inside diameter. Should be of a length so that it extends beyond all cuts of extension piece at least 2"-50mm on each side when it's in final position. This piece should extend beyond last of holes you drilled in outer tube and should be polished smooth at edges of its cuts. Before adding this inner reinforcement tube mark several rings around its circumference spaced equally along its length with a Sharpie or other marker. Make a note of how many marks you made. You may want to alternate colors between red and black or do all the rings on one half in red and all on the other half in black.
After inserting the marked reinforcement tube add the extension piece that matches original frame tube o.d. and wall thickness, with that metal also dressed smooth inside. Depending on length of outer extension piece you're adding you may want to drill corresponding holes in it too. Now if necessary you can use a pick or probe through drilled holes to manipulate the innermost piece of tubing into place as a reinforcement between cut areas, extending past cuts. The rings or marks you made around its outside are visible through holes drilled so you can tell you its position even though it's hidden inside frame tubes. Job is easier if the holes you drilled were evenly spaced...
Weld your joints at all cuts, then go back and stop-weld through all the holes to fill them and further tie new metal with old. Now even if all the welds at cuts break you're still in good shape until repairs can be made. That new inner piece isn't going anywhere because it's stop-welded through the drilled holes. Frame is stronger than before modification.
.
-
- I luv the smell of Diesel...
- Posts: 280
- Joined: Tue Sep 20, 2011 8:58 pm
- Location: California
Re: Yam XJ600 Diesel bike conversion
NOTE: There's another way rather than using a pick or probbe to move innermost reinforcement piece. Drill 1 extra hole a few inches beyond where the inner reinforcement tube will end up. Spot weld a long piece of wire to the inside of reinforcement tube at one end, with wire extending through tube and out the other end. The long end of wire can then be poked up through that exta hole. By slowly pulling wire it will drag reinforcement tube into position as you note its progress by the ring marks. Once all's in place snip the wire, poke it back into hole and weld things up.
-
- Site Admin
- Posts: 1290
- Joined: Fri Jul 15, 2011 4:22 pm
- Location: London
Re: Yam XJ600 Diesel bike conversion
Aha now thats a good idea! Wish I had known that in the past.
What I have done, but you cant see, is a staggered joint (so half of the top of one tube, sits on half of the bottom of another tube, it was then welded along the length of the cut). I covered it with a plate so its not visible.
I have gone over all the welds yesterday and am now happy with the strength of them. I also welded on the left brake pedal adapter as I had to swap sides, and I lifted the bike using it and a winch. I also beat it with a large hammer repeatably and only dented it, so im happy
-
- Site Admin
- Posts: 1290
- Joined: Fri Jul 15, 2011 4:22 pm
- Location: London
Re: Yam XJ600 Diesel bike conversion
Finished doing the Nut link belting as there werent any belts available
and built up the clutch, using the motorbike clutch springs apart from microcar ones, its much lighter and lovely
A quick video:
http://youtu.be/10LXijeCJ38
and built up the clutch, using the motorbike clutch springs apart from microcar ones, its much lighter and lovely
A quick video:
http://youtu.be/10LXijeCJ38
-
- I luv the smell of Diesel...
- Posts: 280
- Joined: Tue Sep 20, 2011 8:58 pm
- Location: California
Re: Yam XJ600 Diesel bike conversion
Sounds good! As always, hoping the very best for you in this build.
-
- Site Admin
- Posts: 1290
- Joined: Fri Jul 15, 2011 4:22 pm
- Location: London
Re: Yam XJ600 Diesel bike conversion
A little update
Got a lot done over the weekend. I ended up using Nu T link belting as I couldnt find a belt length in the right size for me!
I also added another front engine brace on the left hand side, built up the clutch using motorbike springs, which are lighter and give a much better lever action and no slippage. The rear chain has been installer and the rear brake caliper mount and chain tensioning thingys installed. The new throttle cable and idle/throttle cable adjuster has been installed along with the clutch cable.
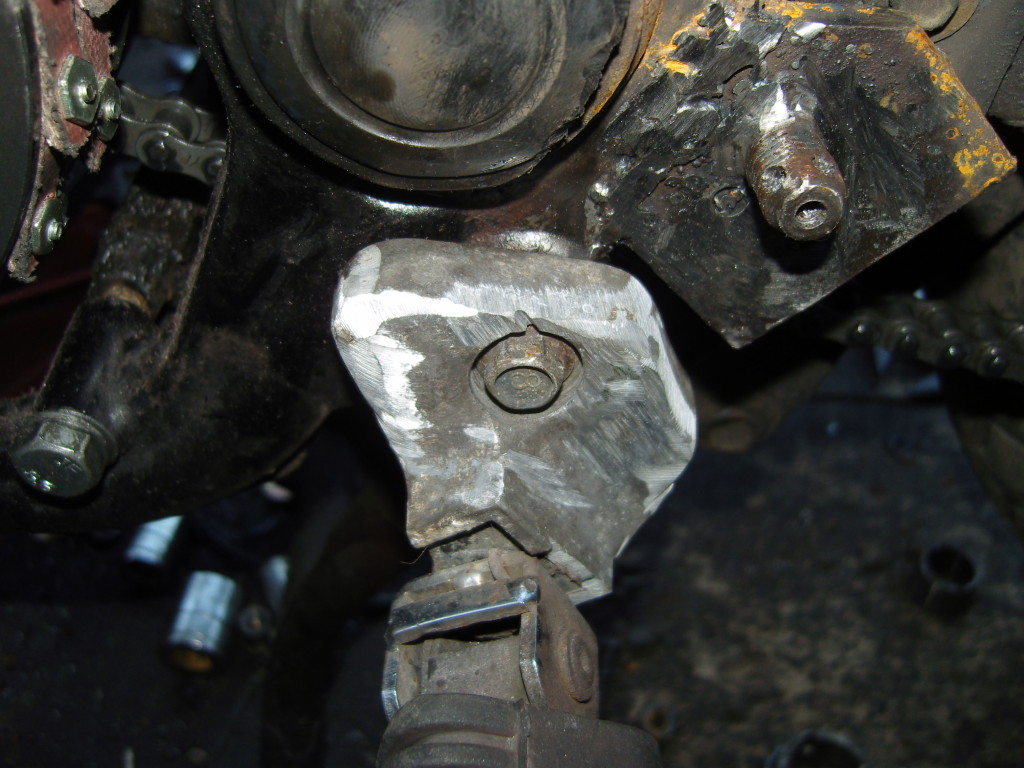
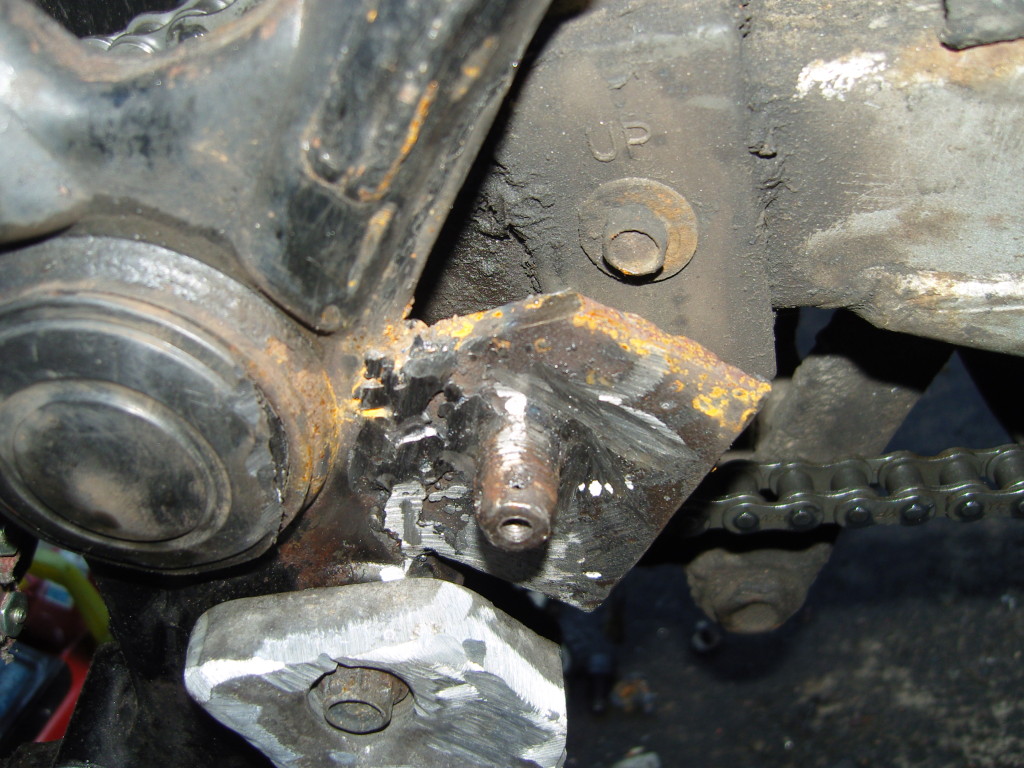
I also worked on the left hand brake lever mount, I started with 5mm plate, and drilled a 15mm hole and used the end of a wheel spindle which has the OD of the brake pedal. I then welded around the bolt on both sides and then welded the plate onto the frame. I then drilled and tapped a whole in the middle of the bolt. I will bend the brake lever so that it clears the foot peg and then screw a bolt with a washer on to the end to keep it in place. (I also need to sort out the caliper mounts, which I think I will just nick from the other side. )
A nice video of the belt drive, and some pictures:
-
- I luv the smell of Diesel...
- Posts: 129
- Joined: Fri Oct 12, 2012 9:04 am
- Location: scotland uk
Re: Yam XJ600 Diesel bike conversion
I think you got those belts running in reverse of what is correct , the narrow pointy end of the belt segments should be pointing to the rear as they go into the drive pulley !
The way you got them your belts are more apt to slip , if you turn them the ends of the segments "wedge" into the pulley and get a better grip !!
-
- Site Admin
- Posts: 1290
- Joined: Fri Jul 15, 2011 4:22 pm
- Location: London
Re: Yam XJ600 Diesel bike conversion
Aha, Thanks! They are a no-brand type belt and didnt come with any documentation etc, I will reverse them! Many thanks.gearhead1951 wrote:I think you got those belts running in reverse of what is correct , the narrow pointy end of the belt segments should be pointing to the rear as they go into the drive pulley !
The way you got them your belts are more apt to slip , if you turn them the ends of the segments "wedge" into the pulley and get a better grip !!
-
- Site Admin
- Posts: 1290
- Joined: Fri Jul 15, 2011 4:22 pm
- Location: London
Re: Yam XJ600 Diesel bike conversion
Some more work recently, the fun bit, wiring
I was keen to avoid the space ship clocks I had on the old diesel bike :
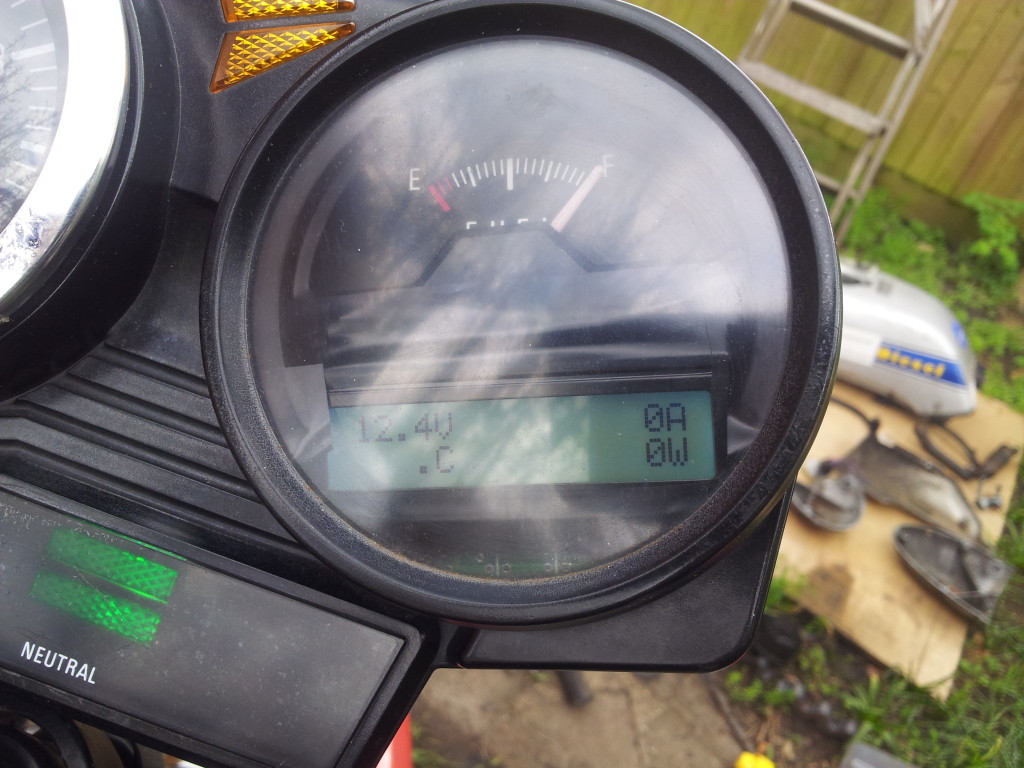
So, I ordered an ammeter, volt meter and temperate sensor all in one and set to work modified the clocks to accept it.
After a bit of cutting and squeezing, im left with:
Granted, it doesnt look that good, as the screen frame is slightly too big for the whole it needs to go in (and keep the fuel gauge readable), but its a lot better.
I couldnt get the XJ600 regulator to charge the battery from the rewound coil, so I wired up the regulator I used on the old diesel bike, as this has a feedback loop to prevent overcharging etc.
The starter motor works works from the starter button, and the fuel solenoid runs of the run switch.
Some pictures of wiring testing and me figuring out where everything goes:
Additionally the fan forced cooling has been fitted to the engine, these will be wired to a digital thermostat and will come on and off depending on demand. I will be burying the sensor deep in the back of the engine out of the air flow, so as to get the hottest temperature.
and an overview of the clocks now:
I was keen to avoid the space ship clocks I had on the old diesel bike :
So, I ordered an ammeter, volt meter and temperate sensor all in one and set to work modified the clocks to accept it.
After a bit of cutting and squeezing, im left with:
Granted, it doesnt look that good, as the screen frame is slightly too big for the whole it needs to go in (and keep the fuel gauge readable), but its a lot better.
I couldnt get the XJ600 regulator to charge the battery from the rewound coil, so I wired up the regulator I used on the old diesel bike, as this has a feedback loop to prevent overcharging etc.
The starter motor works works from the starter button, and the fuel solenoid runs of the run switch.
Some pictures of wiring testing and me figuring out where everything goes:
Additionally the fan forced cooling has been fitted to the engine, these will be wired to a digital thermostat and will come on and off depending on demand. I will be burying the sensor deep in the back of the engine out of the air flow, so as to get the hottest temperature.
and an overview of the clocks now:
-
- Site Admin
- Posts: 1290
- Joined: Fri Jul 15, 2011 4:22 pm
- Location: London
Re: Yam XJ600 Diesel bike conversion
A brief update.
Not much has been going on. I spend a lot of time re-jigging the engine and gearbox moutning holes, and I noticed the drivetrain was out of line (engine and gearbox pulley out of line, then the gearbox and rear wheel chain where out of line).
This has been sorted. Most of the electrics are done including the forced cooling. I need to make a shroud out of ali at some point to cover up the old flywheel casing etc.
I spent a bit of time making a spacer out of old drain pipe for the air filter, as the fuel tank would have blocked it otherwise, some pics below:
-
- Site Admin
- Posts: 1290
- Joined: Fri Jul 15, 2011 4:22 pm
- Location: London
Re: Yam XJ600 Diesel bike conversion
The bike is coming out of the "build area" (garden) today, so I can get the front tyre changed for one with actual tread, and do some test riding up and down the road (ahem), and then I can get tax + mot!
Fingers crossed it goes smoothly!
-
- Been here a while now..
- Posts: 30
- Joined: Tue Dec 08, 2009 3:01 am
Re: Yam XJ600 Diesel bike conversion
love the build...keep it up!
- henneberg
- I luv the smell of Diesel...
- Posts: 130
- Joined: Tue Aug 02, 2011 2:26 pm
- Location: Denmark
- Contact:
Re: Yam XJ600 Diesel bike conversion
Hi, yes keep it going,
interesting to see new combinations of frame, engine and gearbox,
regards, Erik
interesting to see new combinations of frame, engine and gearbox,
regards, Erik
---------------
Enfield Ruggerini MD151 654cc build - running: http://www.youtube.com/watch?v=b4UsIn5QLxk
-
- Site Admin
- Posts: 1290
- Joined: Fri Jul 15, 2011 4:22 pm
- Location: London
Re: Yam XJ600 Diesel bike conversion
Thanks for the motivation!
I recently managed to get the XJ600 out of the garden and onto the street to give it a propert test run!
Everything went fine! Gearbox and clutch worked correctly, clutch was a bit snatchy but we will see if that disappears!
The rear brake needs work as well, the lever is in the wrong place and doesnt give the correct levereage. Apart from that, all seems well.
Video below:
http://youtu.be/iB7VA9AkrTg
Last edited by alexanderfoti on Tue Aug 06, 2013 6:57 pm, edited 1 time in total.
-
- Site Admin
- Posts: 1290
- Joined: Fri Jul 15, 2011 4:22 pm
- Location: London
Re: Yam XJ600 Diesel bike conversion
Sorry, video was marked as private! All fixed
- coachgeo
- I luv the smell of Diesel...
- Posts: 2002
- Joined: Sun Feb 22, 2009 6:00 am
- Location: USA Ohio, Above Cincinnati, Close to Dayton
Re: Yam XJ600 Diesel bike conversion
Look forward to hearing about performance etc. after your little tweaks.
- Stuart
- Site Admin
- Posts: 2221
- Joined: Fri Dec 01, 2006 9:08 pm
- Location: Horsham West Sussex, England
- Contact:
Re: Yam XJ600 Diesel bike conversion
Just seen the video & shared it Good stuff Alex!
Stuart. M1030M1, Honda NC700S, Grom!, Toyota Corolla 1.4 Turbo Diesel. Favouring MPG over MPH.
- old clunker
- I luv the smell of Diesel...
- Posts: 124
- Joined: Fri Aug 26, 2011 8:57 am
- Location: London
Re: Yam XJ600 Diesel bike conversion
That's great alexanderfoti getting the bike on the road, after all your hard work - even though the first ride wasn't exactly legal!!
Good luck with sorting out the remaining minor niggles, and keep us posted with your news.
There's nothing like the smell of burnt vegetable oil in the morning!!
1971 Royal Enfield diesel running on diesel/biofuel.
-
- Site Admin
- Posts: 1290
- Joined: Fri Jul 15, 2011 4:22 pm
- Location: London
Re: Yam XJ600 Diesel bike conversion
Heh indeed, well needs must!old clunker wrote:That's great alexanderfoti getting the bike on the road, after all your hard work - even though the first ride wasn't exactly legal!!
Good luck with sorting out the remaining minor niggles, and keep us posted with your news.
Just sorted out the rear brake lever by adding a lever extension to straighten out the Mc rod and realised I was missing the chain guard and left rear footpeg.
Also on the test ride I noticed that the cylinder head temperature gauge shows 90 degrees very quickly. I'm hoping on the open road it will be better.
The relay that actuated the fans is also intermittent.
Everything should be fine for its MOT though.
-
- Site Admin
- Posts: 1290
- Joined: Fri Jul 15, 2011 4:22 pm
- Location: London
Re: Yam XJ600 Diesel bike conversion
Currently waiting for the mot to complete.
-
- Site Admin
- Posts: 1290
- Joined: Fri Jul 15, 2011 4:22 pm
- Location: London
Re: Yam XJ600 Diesel bike conversion
It Passed!
2 Advisories, noisy Exhaust (heh) and slightly rear wheel bearing play!
- old clunker
- I luv the smell of Diesel...
- Posts: 124
- Joined: Fri Aug 26, 2011 8:57 am
- Location: London
Re: Yam XJ600 Diesel bike conversion
That's really great news alexanderfoti, I'm sure that you'll sort out the 'advisories'!!
The bike must have made the MOT tester scratch his head a bit, unless he's come across diesel bikes before!
There's nothing like the smell of burnt vegetable oil in the morning!!
1971 Royal Enfield diesel running on diesel/biofuel.
-
- Site Admin
- Posts: 1290
- Joined: Fri Jul 15, 2011 4:22 pm
- Location: London
Re: Yam XJ600 Diesel bike conversion
He seemed impressed to be fair, a lot of bikers sneer at the idea and keep asking why, this one seemed a bit more open mided!
In fact, I was so impressed with the whole place that I booked my car in next week as well!
- Stuart
- Site Admin
- Posts: 2221
- Joined: Fri Dec 01, 2006 9:08 pm
- Location: Horsham West Sussex, England
- Contact:
Re: Yam XJ600 Diesel bike conversion
Well done! I am getting my Tiger done later. Fingers crossed lol
Passed!
Passed!
Stuart. M1030M1, Honda NC700S, Grom!, Toyota Corolla 1.4 Turbo Diesel. Favouring MPG over MPH.
-
- Site Admin
- Posts: 1290
- Joined: Fri Jul 15, 2011 4:22 pm
- Location: London
Re: Yam XJ600 Diesel bike conversion
Hopefully I will see you all at the next big knock!